Injection molding cone surface joint guide mechanism
The injection molding conical surface guide mechanism is a high-precision mold guide device that achieves precise alignment between the moving and fixed molds through the mating of conical surfaces. It is widely used in molds requiring high clamping accuracy, such as those used for precision gears and optical lenses. Compared to traditional guide pin and sleeve guides, the conical surface guide offers the advantages of high positioning accuracy and excellent guiding stability. Its clearance can be controlled within 0.005-0.01mm, far smaller than the clearance of guide pins and sleeves (0.01-0.03mm). This effectively reduces misalignment during mold clamping, ensuring the relative positional accuracy of the cavity and core, and preventing flash or dimensional deviations caused by misalignment.
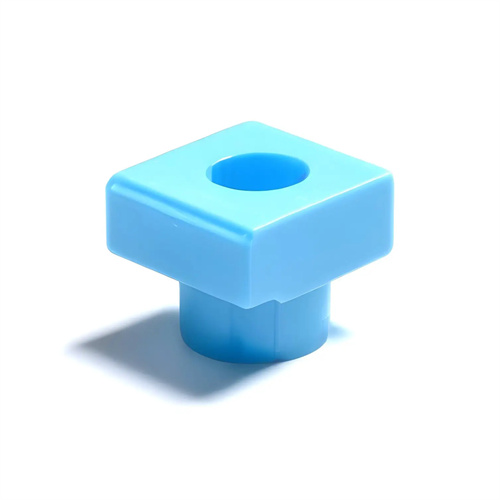
The structural design of the conical surface matching guide mechanism must ensure the rationality of the conical surface matching. It is mainly composed of a conical locating pin and a conical sleeve. The conical locating pin is installed on the fixed platen, and the conical sleeve is installed on the movable platen. The cone angle of the two is usually 10°-30°. Too small a cone angle will result in a small contact area of the matching surface and insufficient guiding stability; too large a cone angle will increase the mold closing resistance and easily cause wear. The material of the locating pin and the conical sleeve is made of high-strength alloy tool steel (such as Cr12MoV). After quenching, the hardness reaches 55-60HRC and the surface roughness Ra≤0.02μm, ensuring that the matching surface is smooth and wear-resistant. The length of the locating pin must ensure that during the mold closing process, the cone surface contacts before the cavity contacts, so as to achieve guide positioning in advance and avoid collision between the core and the cavity. Usually, the length of the locating pin is 5-10mm longer than the cavity depth.
The installation position of the conical surface matching guide mechanism must be arranged rationally according to the mold structure to ensure balanced force. For small and medium-sized molds, two sets of conical surface guide mechanisms are usually installed at the diagonal positions of the mold, used in conjunction with the guide pins and guide sleeves at the four corners to form a double guide. For large or high-precision molds, 4-6 sets can be installed, symmetrically distributed along the mold center to enhance guiding stability. During installation, the coaxiality error between the conical locating pin and the conical sleeve must be ≤0.005mm. The locating pin and the fixed platen, and the conical sleeve and the movable platen, must use an interference fit (H7/r6) to prevent loosening during use. The conical surface guide mechanism must remain perpendicular to the mold parting surface, with a verticality error of ≤0.005mm/100mm to avoid lateral forces generated during mold closing, which may cause conical surface wear or mold deformation.
The fitting accuracy of the conical surface guide mechanism must be ensured through precision machining, and the angular and dimensional tolerances of the conical surface must be controlled during the machining process. The cone angle tolerance of the conical locating pin and the tapered sleeve must be controlled within ±5′, and the large end diameter tolerance is IT6-IT7 to ensure a uniform fitting clearance between the two. A dedicated grinder can be used for machining the conical surface, with a surface roughness of Ra0.01μm to avoid poor fitting due to surface roughness. After assembly, a mold closing test is required, and a dial indicator is used to check the offset of the movable plate during the mold closing process to ensure that the offset is ≤0.005mm. If the offset exceeds the tolerance, the conical surface must be reground until the accuracy requirements are met. During use, the conical surface wear must be checked regularly. When the fitting clearance exceeds 0.015mm, the locating pin or tapered sleeve must be replaced to ensure guiding accuracy.
The use of the conical surface matching guide mechanism requires good lubrication and maintenance to extend its service life. Before closing the mold, high-temperature grease (such as lithium-based grease) must be applied to the conical surface to reduce friction and wear on the matching surface. The grease must have good adhesion and high temperature resistance (-20-150°C) to avoid loss at high temperatures. Before each production, impurities and plastic debris on the conical surface must be cleaned to prevent particles from entering the matching surface and causing scratches. For molds that are used for a long time, the conical surface guide mechanism must be disassembled regularly and ultrasonic cleaning (frequency 40kHz) with a special cleaning agent must be used to remove residual grease and dirt. The conical surface must be checked for scratches or wear and repaired by grinding if necessary. Through reasonable design, precise processing and standardized maintenance, the conical surface matching guide mechanism can provide stable and reliable guiding and positioning for high-precision molds, ensuring the dimensional accuracy and appearance quality of the product.
