Roughness expression method and meaning
Surface roughness, a geometric parameter that describes the microscopic unevenness of an object’s surface, is of great significance in fields such as mechanical manufacturing, mold design, and product testing. Its value directly affects the fit, wear resistance, sealing, and appearance of parts. Roughness can be expressed using parameter symbols, numerical notations, and graphical symbols. Different representations are suitable for different application scenarios. Understanding these representations and their meanings is fundamental to ensuring product quality.

Roughness parameters primarily include Ra, Rz, and Ry. Ra (arithmetic mean deviation of the profile) is the most commonly used parameter, representing the arithmetic mean deviation of each point on the profile from the reference line within the sampling length. Ra values are expressed in micrometers (μm), with smaller values indicating smoother surfaces. For example, a surface with a Ra of 0.8μm is smoother than one with a Ra of 3.2μm. Rz (maximum profile height) represents the distance between the peak and valley of the profile within the sampling length and is suitable for evaluating parts with less stringent surface roughness requirements. Ry (maximum profile peak height) represents the maximum peak value of the profile within the sampling length and is often used in applications with stringent surface finish requirements, such as the mating surfaces of precision bearings. In mold design, cavity surfaces are typically labeled with the Ra value, while core mating surfaces are sometimes labeled with both the Ra and Rz values to comprehensively reflect surface quality.
Roughness numerical notation must comply with the national standard GB/T 131-2006. It should be marked on the part’s outline or extended line, with the tip of the symbol pointing toward the surface. For example, “√ Ra1.6” indicates the surface’s arithmetic mean deviation is 1.6μm; “√ Ra0.8max” indicates the surface’s Ra value must not exceed 0.8μm. For surfaces requiring material removal, the “√” symbol with a handle is used; for surfaces requiring no material removal (such as the rough surface of a casting), the “√” symbol without a handle is used. When multiple surfaces on the same part have the same roughness requirement, a unified notation, such as “All surfaces Ra 3.2,” can be used in the upper right corner of the drawing. Furthermore, the sampling length should be determined based on the Ra value. The smaller the Ra value, the shorter the sampling length. For example, for Ra 0.02-0.1μm, the sampling length is 0.08mm; for Ra 0.2-1.6μm, the sampling length is 0.8mm.
Graphic symbols for roughness have clear meanings in mechanical drawings. In addition to the basic symbols, they also include modifiers such as dashes and circles. The basic symbol “√” simply indicates the presence of surface roughness and does not specify specific parameters. Adding a dash to the basic symbol indicates that the surface must be obtained through machining; adding a circle indicates that all surfaces have the same roughness requirement. For example, on a drawing of a mold cavity, the marking “√ Ra0.4” indicates that the cavity surface must be ground or polished to an accuracy of Ra0.4μm; while the non-molding surface of the core may be marked “√ Ra6.3,” indicating that this surface can be achieved through milling. These symbols not only provide clear process requirements for processing personnel but also provide inspection personnel with a testing basis to ensure the standardization of the production process.
Different roughness values correspond to distinct surface conditions and processing methods. Surfaces with a Ra of 0.012-0.025μm are mirror-finished and require ultra-fine polishing or grinding. They are primarily used for high-precision parts such as optical lenses and precision gauges. Surfaces with a Ra of 0.05-0.1μm are highly polished and require fine polishing, making them suitable for injection mold cavities to ensure the gloss of the plastic part. Surfaces with a Ra of 0.2-0.8μm are precision-machined surfaces achieved through grinding or fine turning, and are primarily used for mating parts such as bearings and gears. Surfaces with a Ra of 1.6-6.3μm are conventionally machined and require milling or planing, making them suitable for non-mating surfaces of structural parts. Surfaces with a Ra of 12.5-25μm are rough, primarily as blanks or rough-machined surfaces, and are used for parts requiring less demanding surface quality. Understanding these relationships helps you choose the appropriate roughness value based on the part’s intended use during design, avoiding either excessively high requirements that increase processing costs or excessively low requirements that affect product performance.
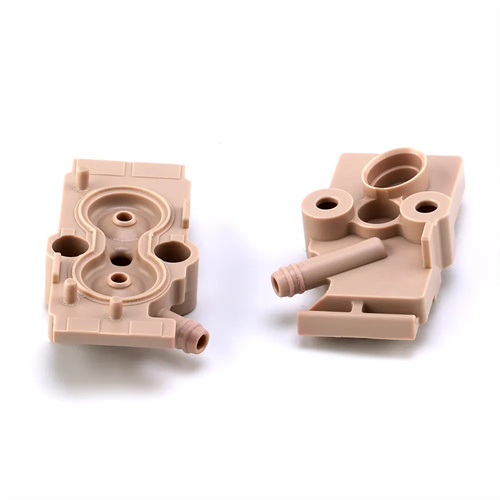
The practical application of roughness must be comprehensively considered in conjunction with the functional requirements of the part. For sliding surfaces, such as guide rails and pistons, a smaller Ra value (Ra 0.4-1.6μm) is recommended to reduce friction and wear. For sealing surfaces, such as pipe joints and valve faces, the Ra value should be kept below 0.8μm to ensure sealing performance. For decorative surfaces, such as automotive panels and appliance housings, not only a low Ra value (Ra 0.02-0.8μm) is required, but also surface gloss and texture consistency must be considered. For surfaces subject to high stress, a moderately increased roughness (Ra 3.2-6.3μm) can increase the surface friction coefficient and enhance connection reliability. Furthermore, when measuring roughness, the appropriate testing instrument should be selected based on the indicated parameters. For example, Ra values are often measured with a stylus roughness tester, while Rz values can be measured with a light section microscope to ensure the accuracy of the test results. Correctly understanding and applying roughness representation methods can effectively improve product design quality and production efficiency.
