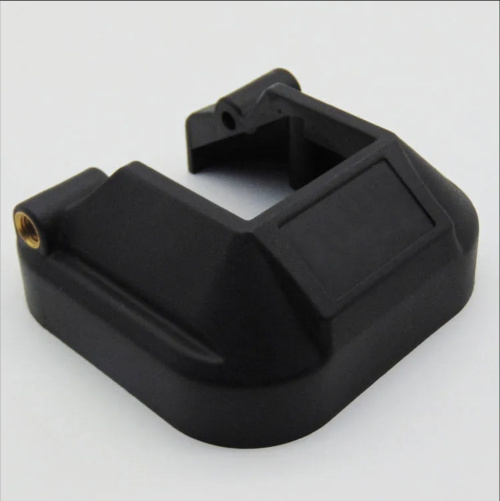
Injection Molded Square Guide Pillar Design
Injection molding square guide pins are crucial components in mold guide systems. Compared to round guide pins, their unique square structure provides more stable guidance, particularly when withstanding lateral forces. They are widely used in large and precision molds, as well as molds requiring anti-rotation features. The design quality of square guide pins directly impacts mold opening and closing accuracy, motion smoothness, and service life. Therefore, system optimization is crucial, encompassing multiple aspects, including structural dimensions, material selection, and machining accuracy.
The structural dimensions of square guide pins must be determined based on the mold specifications and stress conditions. Cross-sectional dimensions are a key parameter, typically selected based on the thickness and width of the mold formwork. For small molds, square guide pin cross-sectional dimensions can be 20mm×20mm or 25mm×25mm; for medium-sized molds, 30mm×30mm or 40mm×40mm; and for large molds, 50mm×50mm or larger. Regarding length, the effective guide length of a square guide pin should be at least three times its cross-sectional length to ensure guiding stability. For example, for a 40mm×40mm square guide pin, the effective guide length should be at least 120mm. Furthermore, a stepped structure should be designed at the fixed end of the square guide pin, with the step diameter 5-10mm larger than the cross-sectional dimension, to strengthen the connection to the formwork and prevent loosening during long-term use.
Material selection and heat treatment processes are crucial to the performance of Zhidu square guide pins. Square guide pins must withstand frequent friction and impact, so they are typically constructed from high-strength alloy structural steels such as 40Cr and SKD61. After quenching and tempering, 40Cr steel can reach a hardness of HRC28-32, offering excellent toughness and wear resistance, making it suitable for general precision molds. SKD61 steel is a hot work die steel that can reach a hardness of HRC45-50 after quenching and tempering. It exhibits excellent impact and heat resistance, making it suitable for high-temperature forming molds or precision molds. Regarding surface treatment, the guide surface of the square guide pin is nitrided to a depth of 0.1-0.2mm, increasing the surface hardness to above HRC55, significantly enhancing wear resistance. The resulting nitrided layer also improves corrosion resistance and extends service life.
The machining accuracy of square guide pins directly impacts the guiding effect. The flatness error of the guide surface must be controlled within 0.01mm/m, and the perpendicularity error of adjacent side surfaces must not exceed 0.01mm to ensure a uniform clearance with the guide sleeve. The selection of the clearance should be determined based on the mold accuracy requirements. Precision molds use an H7/h6 clearance fit with a clearance value of 0.005-0.015mm; standard molds can use an H8/h7 fit with a clearance value of 0.015-0.03mm. During machining, precision grinding is required. First, rough grinding is performed to remove most of the excess, followed by fine grinding to ensure accuracy, and finally, super-fine grinding is performed to achieve a surface roughness of Ra0.4μm or less on the guide surface to reduce friction with the guide sleeve. Square guide pins with an aspect ratio greater than 5 require aging treatment after machining to eliminate internal stresses and prevent deformation during use.
The design of the matching square guide pin and guide sleeve is key to the guide system. The inner hole size of the square guide sleeve must be precisely matched to the square guide pin. It can be made of bronze or wear-resistant cast iron. Bronze guide sleeves are self-lubricating and suitable for low-speed motion molds; wear-resistant cast iron guide sleeves are lower cost and suitable for mass production molds. The length of the guide sleeve is generally 1.5-2 times its cross-sectional dimension. Excessive length increases processing difficulty and cost, while excessive shortness affects guiding accuracy. For ease of installation, the ends of the square guide pins need to be designed with a 15°-30° chamfer, and the entrance of the guide sleeve also needs a corresponding chamfer or radius to avoid impact during mold closing. In the mold structure, the square guide pins must be arranged symmetrically and evenly, usually with one at each of the four corners of the mold. For large molds, auxiliary square guide pins can be added in the middle to further improve guiding stability.
The installation and maintenance of square guide pins are equally important to ensuring guiding performance. During installation, the fixing holes of the square guide pins must maintain strict positioning accuracy with the positioning datum of the template. The verticality error of the hole axis should not exceed 0.02mm/100mm. They should be fixed by interference fit or bolt tightening to ensure that they do not loosen during use. During use, the fitting clearance between the square guide pins and guide sleeves must be checked regularly. When the clearance increases to twice the initial value, the guide sleeves must be replaced promptly. Before each shift, high-temperature grease must be applied to the guide surface to reduce friction and wear. For molds that have not been used for a long time, the surfaces of the square guide pins and guide sleeves must be cleaned and coated with anti-rust oil to prevent rust. Through reasonable design, precise processing and standardized maintenance, square guide pins can provide stable and reliable guidance for molds, ensuring the molding quality of plastic products.
